Let’s say I’m a professional photographer and I need a new website. The best thing to do generally is to ask someone else to do it. But what if I’m just starting out and don’t have money to spend on a fancy website? I can get a basic website for free using WordPress.
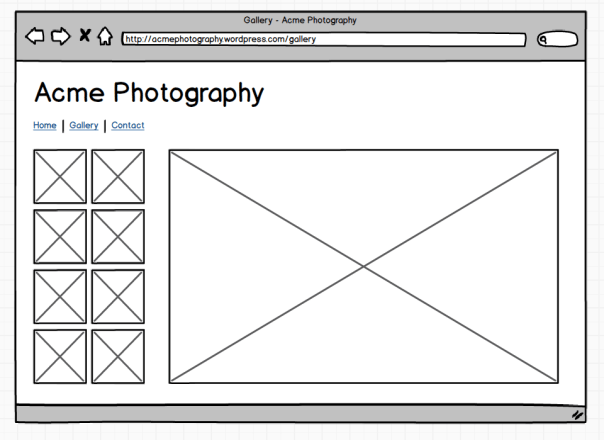
First of all, I’m going to create a mockup of my new website:

Home page should have a nice big image, a heading and a menu bar. The gallery page should have thumbnails. Visitor should be able to click on any thumbnail to view a bigger photo. Something like this:

Looks good! Next, I need to decide where I’m going to host my website. WordPress.com looks like a good option: it’s free (as long as your website address ends with .wordpress.com) and it is maintained by the same people that make WordPress.
Go to www.wordpress.com and sign up for a new account.

The address of my website is going to be acmephotography.wordpress.com

This is how my brand new website looks like:

Not very close to the mockup, isn’t it? Let’s fix it.
The next step is to choose a theme for my website. The problem with WordPress themes is that there are just too many of them. After some poking around I decided to try Twenty Twelve theme by the WordPress team. It looks nice and crisp. It has a menu on top. Also, it’s free! Here’s how to set it up.
Go to ‘My Blog’ on WordPress.com and click ‘Dashboard’ link there.

Move mouse over ‘Appearances’ link in the menu on left, then select ‘Themes’:

Search for ‘Twenty Twelve’ theme and click Activate button:

Close the dialog confirming that the theme has been activated. Go to Settings, then General. Set site title to ‘Acme Photography’. Remove tagline (set it to empty):

Don’t forget to click ‘Save Changes’ button. Now click on website name on the top left to view your website.

Behold: my new photography website, Acme Photography:

It has a title and a menu bar. However the front page doesn’t look right yet. I explain how to configure front page in my next post.